
How to Annotate a Screenshot of a Website (Mac, Windows & Online)
By GiveFeedback.ioUpdated 7 min readEspañol

Knowing how to annotate a screenshot well saves more time than any tool choice. A website screenshot with one red box and a sentence like "logo overlaps the menu on 1366px screens" gets fixed the same day; one covered in scribbles with "see attached" gets a reply asking what you meant. Windows, macOS and the main browsers already include everything you need to capture and mark up a page; what decides whether it gets fixed is how you mark the problem.
What is screenshot annotation?
Screenshot annotation is adding visual marks such as arrows, boxes, highlights and text to a screen capture so that the person who receives it sees exactly what you mean. In website work, the annotated screenshot is usually the core of a bug report or a design change request, sent to a developer or designer who wasn't looking at your screen when you found the problem.
The annotation only does half the job. The other half is context: which page, which browser, which screen size. Keep that in mind in the options below, because some capture that context for you and most don't.
How do you annotate a screenshot on Windows?
Press Windows + Shift + S, drag over the area you want, then click the notification to open the capture in Snipping Tool. Its editor has a pen, a highlighter, shapes such as arrows and rectangles, an eraser, crop and undo. Save the image or paste it straight into an email, a chat or a task. Nothing needs installing.
Microsoft's Snipping Tool help lists every option. Snipping Tool is enough when you report a bug now and then and you're the one finding the issues. What it doesn't do: record the page URL, the browser or the screen size, so you have to type them under the image yourself.
How do you annotate a screenshot on a Mac?
Press Shift + Command + 4 to select an area, or Shift + Command + 5 to open the Screenshot app with more options, then click the floating thumbnail in the corner. That opens Markup, where you can draw, add shapes, arrows and text, highlight and crop before saving or dragging the image where it needs to go.
Apple's guide lists all the shortcuts. Like Snipping Tool, Markup is free and good for occasional use, and like Snipping Tool it knows nothing about the page you captured: add the URL and browser by hand.
How do you capture and annotate a full web page?
Capture the full page with the browser, then annotate the image in any editor. Firefox and Microsoft Edge have a full-page option in their built-in screenshot tools, and Chrome can capture a full-size screenshot from DevTools. Full-page captures are useful for comments on spacing or layout across a long page.
| Browser | How to open it | Full page | Built-in annotation |
|---|---|---|---|
| Firefox | Ctrl+Shift+S (Cmd+Shift+S on Mac) or right-click, then Take Screenshot | Yes ("Save full page") | No, copy or download only |
| Microsoft Edge | Ctrl+Shift+S (Screenshot, formerly Web capture) | Yes | Basic markup (draw, shapes, text) |
| Chrome | DevTools, then the Command Menu (Ctrl+Shift+P), then "Capture full size screenshot" | Yes | No |
Sources: Mozilla's Firefox screenshots help, Chrome's Command Menu docs and Edge's built-in tool, checked in October 2026. Edge's markup options change between versions, so check what yours shows.
Can you annotate a screenshot online or in Chrome?
Yes, in two ways. Browser extensions and web-based annotation tools let you capture or upload a screenshot, mark it up in the browser and share a link. A feedback widget installed on the website itself goes further: the reviewer clicks a button on the page, annotates it there, and the report arrives with the URL and browser details attached.
The categories, as of 2026:
- Desktop screenshot apps: free open-source tools on Windows and paid apps on Mac and Windows add blur, numbered steps, scrolling capture and cloud links. Good for a team that takes dozens of screenshots a week; every person needs the app installed.
- Browser extensions and web annotators: capture or paste an image, annotate it in a tab, share a link. Quick, but each reviewer has to install or find the tool, and the page URL and browser are still typed by hand.
- In-site feedback widgets: a script on the website shows a feedback button on every page. Nobody installs anything, and the screenshot, comment, URL and browser details land together in a dashboard or project tool.
| Situation | Best option |
|---|---|
| You find a bug once a week and fix it yourself | Windows Snipping Tool or Mac Markup |
| You need to comment on a long landing page as a whole | Browser full-page capture plus any editor |
| Your team writes documentation or support replies all day | A desktop screenshot app |
| Clients or testers review a website before launch | An in-site feedback widget |
| Feedback must end up as tasks in your project tool | A feedback widget connected to that tool |
Many agencies use two: a desktop app for internal work and a widget for client reviews. For the wider comparison, see how to choose a website feedback tool.
How do you annotate a website screenshot so it gets fixed?
Capture enough of the page for orientation, put one mark on one problem, label it with what is wrong and what you expected, use colour consistently, hide private data, and attach the page URL, browser and screen size. One problem per screenshot: a developer fixes and closes issues one at a time, and five marks on one image usually end with four fixed and one forgotten.
- Capture the right area: include the header or section title for orientation, not your bookmarks bar and thirty tabs. If the problem depends on screen width, say the width.
- One mark per problem: one rectangle or one arrow. Three problems mean three screenshots.
- A short label: "Button text cut off, should read 'Book a call'", not "this", "fix" or "??".
- Colour on purpose: red for errors, another colour for suggestions. Don't put highlighter over text you want read.
- Private data hidden: blur or crop customer emails, order numbers and personal details before sending.
- Context attached: page URL, browser and version, operating system and screen size. Widgets add these automatically; with other tools, type them under the image.
Bad example: a full-screen capture with three red circles, two arrows and a scribbled "?!", sent by email with the subject "website".
Good example:
Title: Contact form submit button overlaps footer on mobile
Annotation: one red rectangle around the button and footer, label "overlaps footer"
Expected: 24px gap between button and footer, as in the design
URL: https://staging.example.com/contact/
Environment: Chrome 129, Android 14, 412x915
The developer can open that URL at the same screen size and see the issue in a minute. For the full set of fields, use our bug report template.
How do you get annotated screenshots to the developer?
Agree on one place where every screenshot goes: a task in the team's project tool, one per issue, or a shared feedback dashboard with statuses. Chat and email work for a single question, but a review round with forty comments turns them into a search problem, and screenshots sitting in someone's Downloads folder help nobody.
This is how GiveFeedback.io handles it, as a step-by-step workflow:
- Install: paste one script into the site's
<head>(the install guides cover WordPress, Shopify, Wix, Squarespace, PrestaShop and Google Tag Manager). - Click: a "Give Feedback" button appears on the site; the client clicks it, with no account.
- Capture: on a computer the browser asks permission to capture the tab (phones skip this step), and the visible part of the page is captured.
- Annotate: the client marks it up with arrows, rectangles, ellipses, text, a pen or a highlighter, in five colours, then adds a title, a description and a type such as Bug.
- Deliver: the report arrives with the page URL, screen resolution, OS, browser and version, language and time zone, and can be created as an issue in Jira, a card in Trello, a task in Asana, ClickUp or Wrike, an item in monday.com, a page in Notion, a message in Slack or Discord, or an email to your team.
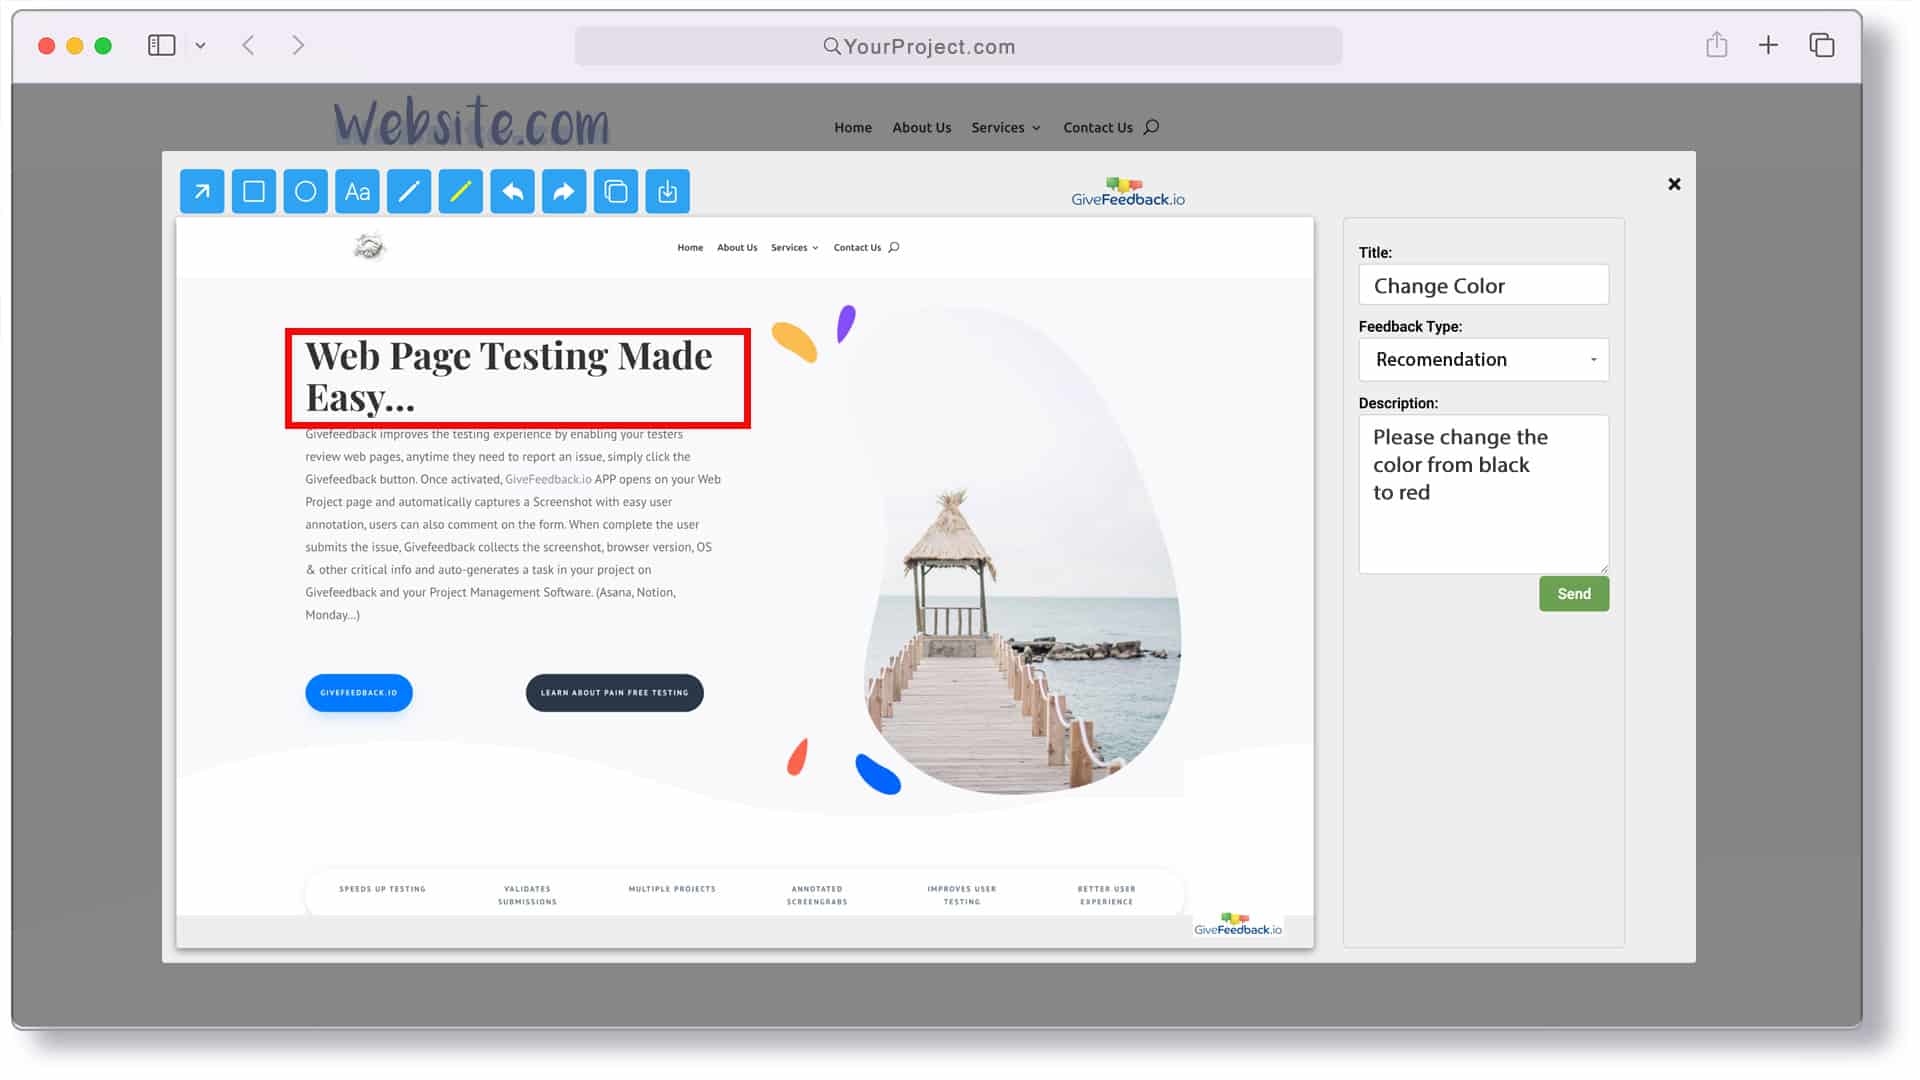
If you only remember one thing: one problem, one mark, one sentence, plus the URL and browser. Pick the tool that makes that easiest for the person reporting, which for client reviews is usually the one they don't have to install.
Frequently asked questions
What is the easiest way to annotate a screenshot?
Use the tool already on your computer. On Windows, press Windows, Shift and S, then open the capture in Snipping Tool to draw, highlight and add shapes. On a Mac, press Shift, Command and 4, then click the thumbnail to open Markup. Neither needs anything installed, and both are enough for occasional website feedback.
How do I annotate a screenshot on a Mac?
Press Shift, Command and 4 and drag over the area, or Shift, Command and 5 for more options. Click the thumbnail that appears in the corner to open Markup, where you can draw, add arrows, shapes and text, and highlight. Then save the image or drag it straight into an email, a chat or a task.
How do I take a screenshot of a whole web page?
Use the browser. Firefox's screenshot tool, opened with Ctrl, Shift and S, has a Save full page option; Microsoft Edge's Screenshot tool also captures the full page; in Chrome, open DevTools and run Capture full size screenshot from the Command Menu. Then annotate the image in any editor. Most feedback widgets capture only the visible part.
Can I annotate a screenshot online without installing anything?
Yes. Web-based annotation tools let you upload or paste an image, mark it up in the browser and share a link, and a feedback widget on the site lets reviewers capture and annotate the page they are on. Avoid uploading screenshots with customer data to services you haven't checked.
Should I blur sensitive data before sending a screenshot?
Yes, if it shows customer names, emails, order data or anything private. Use an editor with a blur or pixelate option, or crop the area out. Better still, review staging sites with a test account and sample data, so there's nothing private on screen in the first place, and look at the image once more before you send it.
Keep reading
Guides
Website Handover Checklist: 43 Items to Hand Over at Launch (Free Template)
A website handover checklist for agencies and freelancers: accounts, domain, hosting, backups, licenses and support terms, plus a free handover document.
- 12 min read

Guides
How to Choose a Website Feedback Tool (2026 Checklist)
How to choose the best website feedback tool in 2026: the tool types, 12 criteria, a free scoring template (Excel) and a one-week trial plan with a real client.
- 8 min read

Guides
How to Collect Client Feedback on a Website (Step by Step)
How to collect client feedback on a website: 5 methods compared, a review round step by step, good vs vague feedback examples and a briefing email to send today.
- 9 min read
Collect visual feedback on your next website
Visual website feedback for agencies, freelancers and their clients.
Free plan - No credit card - Set up in minutes